


 Your profile
  Social
 Private messages
 Other
Other Wed Oct 20, 2010 11:35 am by


This is a very simple graphic to make and anybody can do it.
1. First of all you need to obtain the EarthMap, I use THIS ONE (click to download), but you can use anything you want, you can even download different colours, styles etc. but for now, this is the most simple on to use.
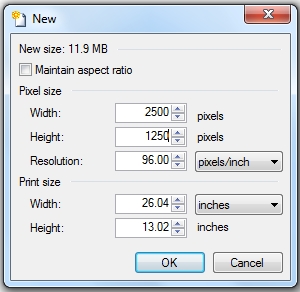
2. Open a new canvas but make it 2500x1200, I know that's big but that's the size of the map and the globe will be re-sized afterwards.
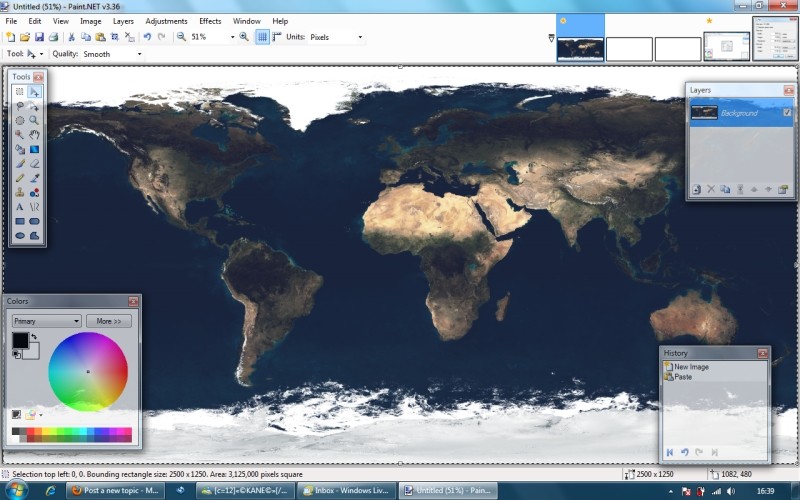
3. And now past the Map onto the canvas so it will look like this...
4. This is where you use the plugin we installed earlier, go to Effects> Render> Shape 3D and it will now look like this.
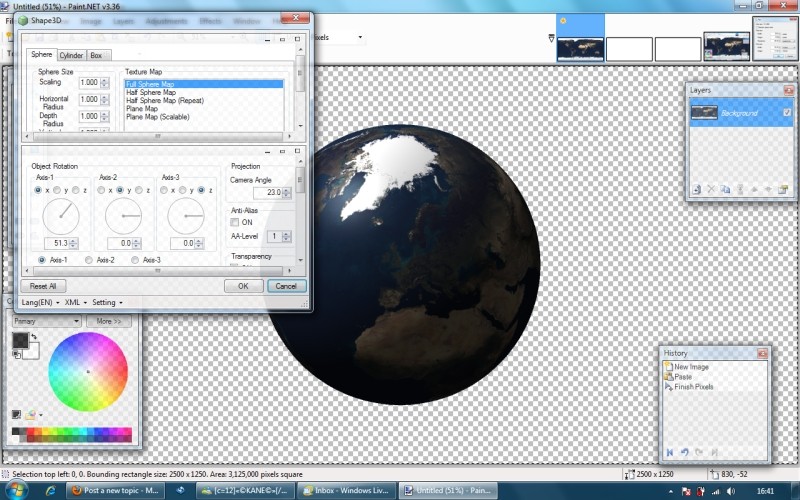
The next bit is up to you, you can leave it there and that's the globe, it's that simple, if you wish to do that then skip to Step 7, but if you'd like to enhance the graphic even more then follow the next steps.
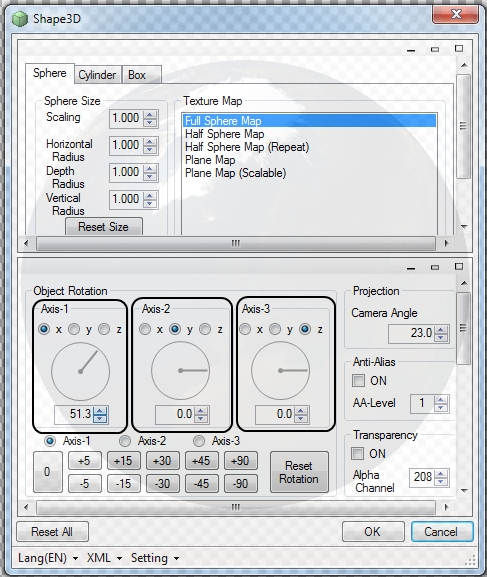
5. I'm going to keep the globe in the same position it's in for the rest of the tutorial but if you wish to move it around then you can move it by changing the 'Axis' in the Shape 3D box, I've highlighted the bits you need to edit in the shot below with black boxes:
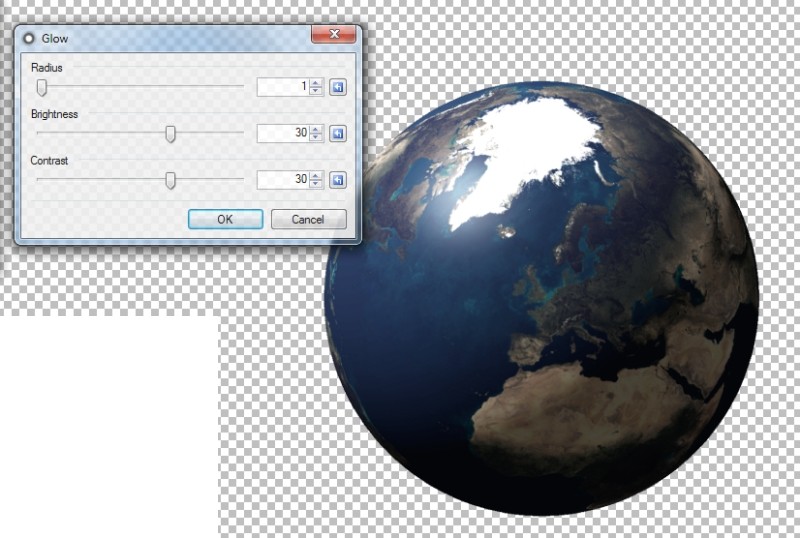
6. Now, go to Effects> Photo> Glow and change the settings so it's set to:
Radius - 1
Brightness - 30
Contrast - 30
That will give the globe what I think is perfect colour but you can edit the settings to make it exactly how you want it.
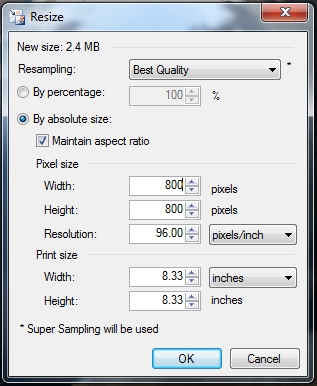
7. Now using the magic wand tool select the area outside of the globe we've just created and now click Ctrl + I this will invert the selection. Now press Ctrl + C or go to Edit> Copy and now create a new canvas, there's no need to set the size as it will automatically set it to the size you need. Before pasting in the globe delete the background by selecting the blank canvas with the magic wand tool and click Delete on your keyboard. That will make the image transparent so you won't have a white background. Now press Ctrl + V or Edit> Paste. This will put the globe onto the canvas so you now have the perfect size. Now press Ctrl + R or go to Image> Resize and make sure 'Maintain Aspect Ratio' is ticket and set the width to 884. The height will automatically change.
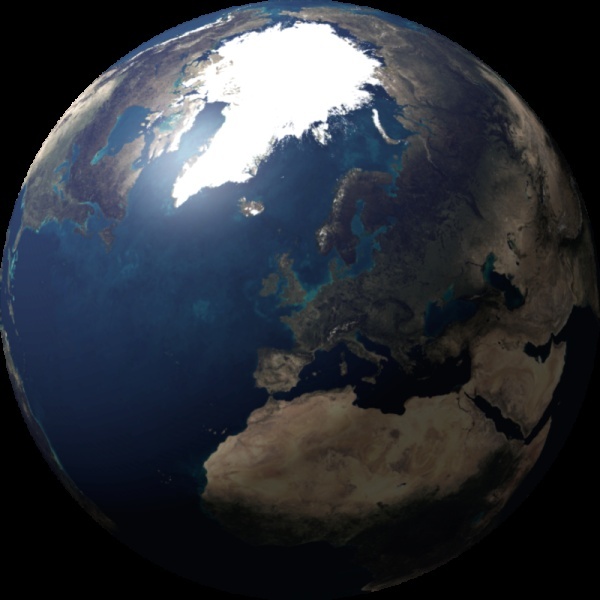
And you'll now end up with this. Note, how we used a black background though, that's because it was creating the graphic for a dark forum.
1. First of all you need to obtain the EarthMap, I use THIS ONE (click to download), but you can use anything you want, you can even download different colours, styles etc. but for now, this is the most simple on to use.
2. Open a new canvas but make it 2500x1200, I know that's big but that's the size of the map and the globe will be re-sized afterwards.
3. And now past the Map onto the canvas so it will look like this...
4. This is where you use the plugin we installed earlier, go to Effects> Render> Shape 3D and it will now look like this.
The next bit is up to you, you can leave it there and that's the globe, it's that simple, if you wish to do that then skip to Step 7, but if you'd like to enhance the graphic even more then follow the next steps.
5. I'm going to keep the globe in the same position it's in for the rest of the tutorial but if you wish to move it around then you can move it by changing the 'Axis' in the Shape 3D box, I've highlighted the bits you need to edit in the shot below with black boxes:
6. Now, go to Effects> Photo> Glow and change the settings so it's set to:
Radius - 1
Brightness - 30
Contrast - 30
That will give the globe what I think is perfect colour but you can edit the settings to make it exactly how you want it.
7. Now using the magic wand tool select the area outside of the globe we've just created and now click Ctrl + I this will invert the selection. Now press Ctrl + C or go to Edit> Copy and now create a new canvas, there's no need to set the size as it will automatically set it to the size you need. Before pasting in the globe delete the background by selecting the blank canvas with the magic wand tool and click Delete on your keyboard. That will make the image transparent so you won't have a white background. Now press Ctrl + V or Edit> Paste. This will put the globe onto the canvas so you now have the perfect size. Now press Ctrl + R or go to Image> Resize and make sure 'Maintain Aspect Ratio' is ticket and set the width to 884. The height will automatically change.
And you'll now end up with this. Note, how we used a black background though, that's because it was creating the graphic for a dark forum.